Sunday, 31 March 2013

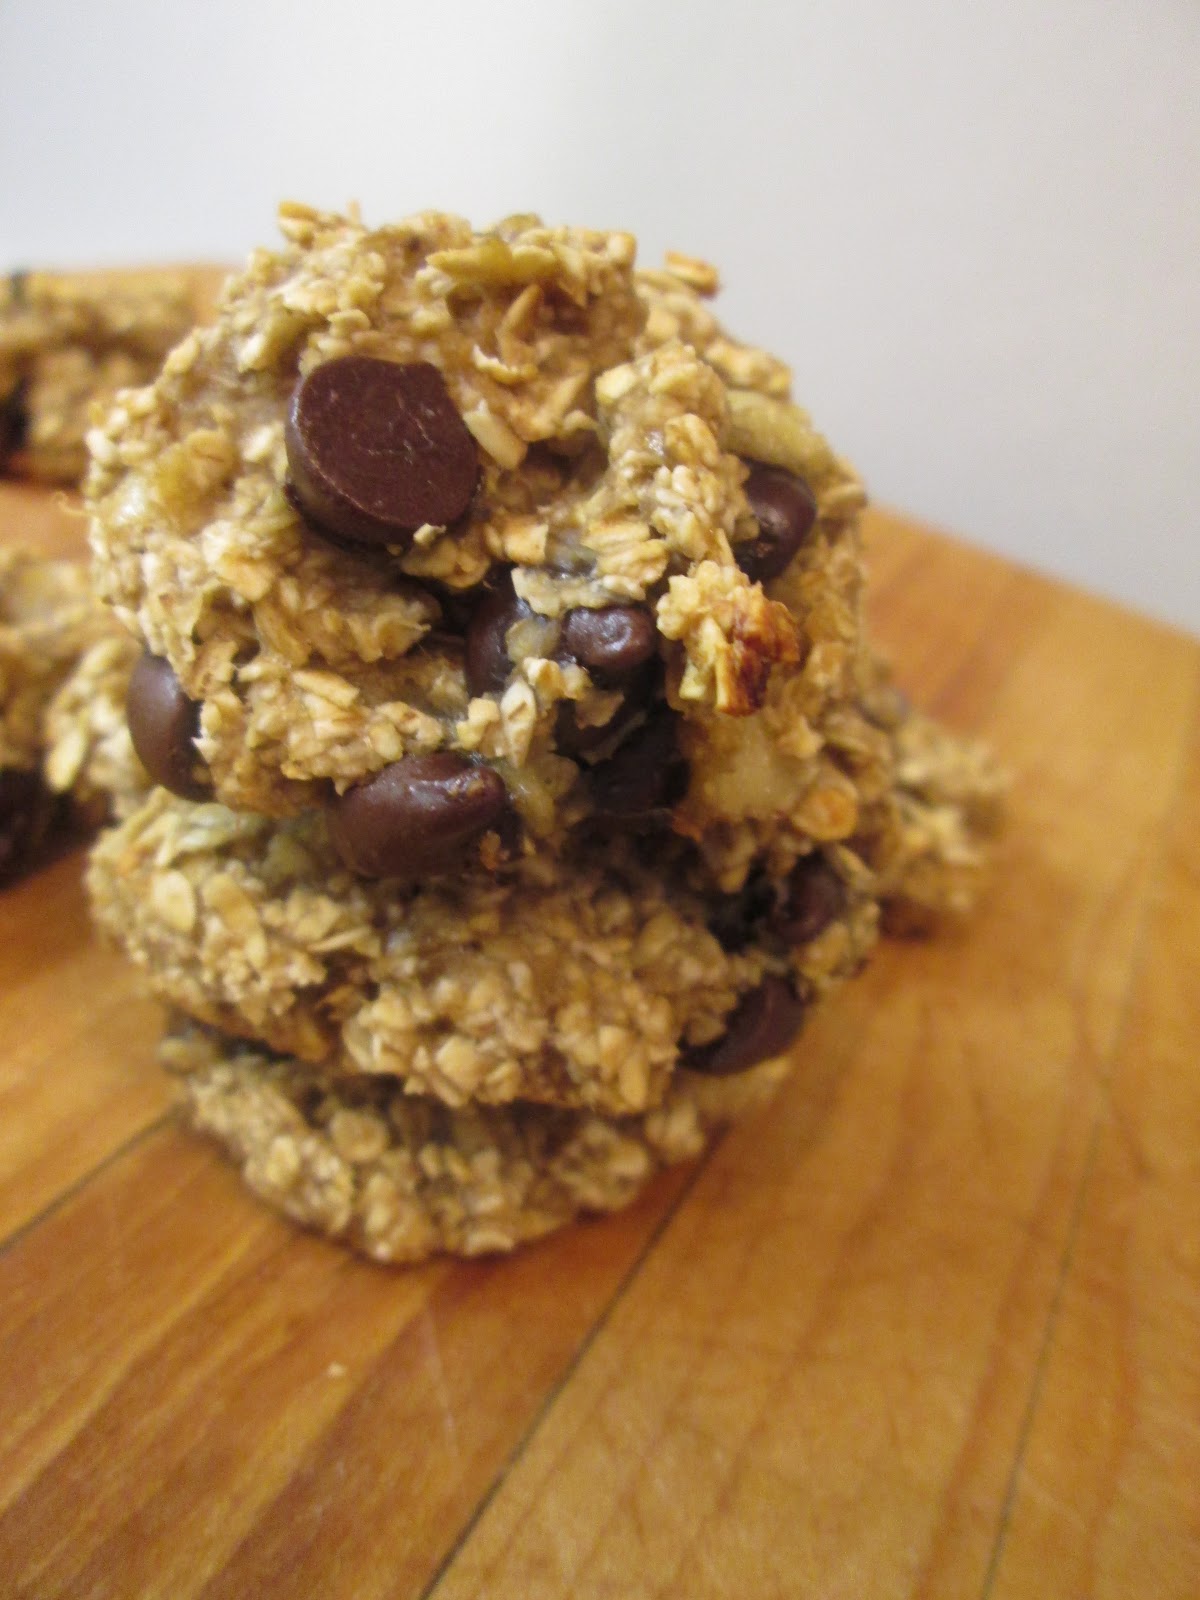
35 Calorie Banana Oat Cookies

WOW! These cookies took no-time at all, it only takes two ingredients and they are healthy. One cookies is only 35 calories (without chocolate chips)or 60 calories (with chocolate chips.) I was pleasantly suprised when I took a bite of these, they actually tasted pretty good. 


I was on pinterest one night and I saw these cookies, they popped out to me, I thought "healthy cookies? there's no such thing!" but when you do the math these are like the equivalent of about 2 saltine cracker. Pretty helpful when you are trying to cut back on sweets. Since I started this blog I have been making a lot of desserts and even hough I work-out a couple times a week, I still find it hard sometimes to stay fit. This recipe was a gift sent from the food gods and when ever I get those pesky cookie craving I will make these instead. 

Yields: 12 cookies
Prep time: 5 minutes
total time: 20 minutes


Ingredients
2 ripe bananas
1 cup oats
1/4 cup chocolate chips (optional) 

Directions
1. preheat oven to 350F and line 1 cookies sheet with parchment paper.

2. In a medium bowl mash together all of the ingredients with a fork.

3. Roll into 12 medium sized cookies and bake for 15 minutes. Cool and enjoy.

NOTE: These are good cookies to freeze and grab 2 when your in a hurry.  

Adapted from http://pinterest.com/pin/30399366207289117/

Wednesday, 27 March 2013

Blondies

Blondies are an interesting treat, they are almost like brownies but blonde. You would think that at first the chocolate element is what makes these bars taste good, but when you try these it will change you opinion completly. Blondies are like very, very chewy cookies that are made into bars and cut into squares. They are probably just as good as any brownie recipe, if anything better. 


I have been making these for the longest time. I was first introduced to the idea of blondies from watching the Nancy Drew movie. This was one of my favourite movies growing up. In one part of the movie Nancy talked about lemon bars and blondies that her friend Hannah had made for her. (How cool that I share a name with this character!) I first experimented with blondies was when I was hanging out with my cousin Olivia. We always have so much fun together in the kitchen, and being a fellow fan of Nancy Drew we made blondies. From then on I love making blondies, as it always reminds me of one of my favourite movies.

Yields: 24 bars
Prep time: 10 minutes
Total time: 40 minutes 


Ingredients
1/2 cup butter
2 cups brown sugar
2 eggs
1 1/2 teaspoons vanilla 
2 cups all-purpose flour
1 1/2 teaspoon baking powder
1/2 teaspoon salt
1/4 cup semi-sweet mini chocolate chips

Directions 
1. Preheat oven to 300F and spray a 9 x 13-inch pan with cooking spray.

2. In bowl of electric stand mixer, combine butter, brown sugar, eggs and vanilla. Stir on medium for 1 minute. In a separate bowl combine all the dry ingredients. Add the dry ingredients to the wet ingredients and mix on low for 15 seconds. Add in chocolate chip and continue stirring until the ingredients are well combine.

3. Press dough into pan and bake for 20-25 minutes. Cool in pan before removing. Cut into 24 squares.

Adapted from KitchenAid Best-Loved Recipes by Lou Weber


Super Moist Brownies

Many times, we see pictures of these moist and fudgy looking brownies and it can be hard to sometimes find that recipe that fulfills your idea of a good brownie. This recipe did it for me. It doesn't get any better than this. I hope you enjoy these chocolatey treats as much as me and my friends do.


In the original recipe it asked for 1 1/2 cups of flour but I decided to put only a cup, so that they would be more chewy and moist. Lowering the flour defiantly did the trick, along with the chocolate chips I added in, the changes made them more delicious and very moist.

Ingredients
1 cup butter
2 cups sugar
1/2 cocoa powder
1 tsp vanilla
4 eggs
1 cup all-purpose flour
1/2 tsp baking powder
1/2 tsp salt
1/2 semi-sweet chocolate chips

Directions
1. Preheat oven to 350F and spray a 9 x 13 pan with cooking spray and then line it with parchment paper.

2. Melt butter in a microwave safe bowl. 

3. In a separate bowl, mix the dry ingredients together. Set aside.

4. To the butter,stir in the sugar, vanilla and eggs. Add the dry ingredients and mix until it is just combined. Stir in the chocolate chips.

5. Pour the batter into the prepared pan and bake for 25-30 minutes. Remove from the oven and allow to cool completely. Cut into squares and serve warm. 

Adapted from http://www.food.com/recipe/super-moist-brownies-460903

Browned Butter Blueberry Muffins

Everybody loves blueberry muffins, and also apple crumble. This recipe is like a blueberry muffin with a tasty crumble on top. The browned butter gives the muffin a great buttery flavor. Great for breakfast or with tea.


At first I was somewhat discouraged because the original recipe ask for the melted butter to cool before you add the milk, eggs and vanilla. When I did this, the butter seemed to congeal and get lumpy and I was sure I had ruined them. But don't get discouraged because they all will turn out lovely. I like to freeze these muffins and eat them later when I am feeling for a quick snack.

Yields: 12 muffins
Prep time: 15 minutes
Total time: 40 minutes

Ingredients
For the Muffins
1/3 cup butter
2/3 cup milk
2 large eggs
1 tsp vanilla
1 1/2 cups all-purpose flour
3/4 cup sugar
1 1/2 tsp. baking powder
1/4 tsp. salt
1 cups fresh or frozen (don’t thaw them) blueberries


For the Crumble
1/4 cup butter, cut into pieces
1/2 cup all-purpose flour
1/4 cup brown sugar


Directions
1. Preheat your oven to 375F and line 1 muffin pan with muffin liners.

2. In a saucepan melt butter on medium heat. Wait until the butter starts foaming and turns an orangy brown. Turn off the heat and put in a medium bowl to cool. Whisk in milk, eggs and vanilla. When you mix the butter with the milk, eggs and vanilla, there may be lumps of butter that have clumped together, this is fine.

3. In a seperate bowl combine all the dry muffin ingredients in a large bowl. Pour the wet ingredients into the mixture and mix well.Stir in the frozen (unthawed) blueberries with a spoon.

4. Pour the batter into the muffin liners. Divide it evenly between the 12 muffin cups. In a new bowl combine all the crumble ingredients. Mix with a fork or the tips of your fingers until it looks crumbly like bread crumbs. Sprinkle evenly over the un-baked mufins. Bake for 25 minutes. Let cool for 5 minutes before removing from muffin tins.  

Adapted from http://www.tworecipesblog.com/2012/04/brown-butter-blueberry-muffins.html

Tuesday, 26 March 2013

Chocolate Fruit Dip

Greek yogurt sort of seems to be the new hip thing. It is low fat, high in nutrients and also a good source of protein. The only downfall to plain greek yogurt is that I don't personally find the taste to be very appealing. So this is a way to get in the perks of Greek yogurt as well as satisfying your sweet tooth. Pair with some nice chopped fruit and you are good to go!


 On a warm summer's day, I love to snack on this. A healthy twist on fondue. I can just inhale this dip. Sometimes I like to also include apples and bananas. If you wanted to make it even more healthy, you could use fat-free yogurt. I used 2% just because it is important that you still have a healthy amount of the right kinds of fat.

 I don't know if it is because of stress with end of term assignments or just the time of year, but I have been craving chocolate like never before. So now I know what to do to put my chocolate cravings in their place.

Yields: 1 small bowl of dip
Total time: 2 minutes

Ingredients
  • 1/2 cup 2% plain greek yogurt
  • 1/4 cup Nutella
Directions

1. In a medium sized bowl, combine yogurt and Nutella. Stir well until combined completely. 

2. Transfer into serving bowl with a spatula and enjoy with fresh fruit like strawberries or bananas or apple. 


Cinnamon Rolls

Oh...My... Goodness... Cinnamon buns are possibly one of the best treats EVER! I have never met someone who has ever turned down one of these. It is usually the deal breaker to anyone's new diet plans but let me tell you, this is so worth it! 
 I have serious problems when it comes to cinnamon buns. I think it has something to do with the fact that there is a Cinnabon store in the subway station that I have to walk by twice day. It is pure torture. Thinking about them just makes my mouth water. so I shall cut this post short or else I might find myself at Cinnabon instead of working on my endless piles of homework. This recipe allows you to create your own cinnabon store in the comfort of your home. They taste great (especially warm) and are so worth the time it takes to roll the dough and make them perfect.


Yields: 16 rolls 
Prep time: 30 minutes
Total time: 1 hour


Ingredients 

For the Filling:
4 tablespoons butter, at room temperature
1 cup brown sugar
3 teaspoons cinnamon
For the Dough:
2 cups all-purpose flour plus more for rolling
2 tablespoons white sugar
3 teaspoons baking powder
1 teaspoon salt 
3 tablespoons butter at room temperature
3/4 cup 2% milk 
1 large egg beaten
For the Frosting:
2 ounces cream cheese, at room temperature
2/3 cup confectioners sugar
3 tablespoons 2% milk
Directions
1. Preheat oven to 400F. Spray a muffin tin with non-stick spray.
2. In a small bowl, combine all the filling ingredients with a fork or your fingers until crumbly and well mixed. Set aside.
3. Prepare the dough. In a large bowl, whisk together flour, sugar, baking powder and salt. Transfer the dry ingredients into the bowl of electric stand mixer and using the pastry attachment, work the butter into the flour mixture. Add the milk and the eggs and then stir until combined.
4. Roll the dough out on a floured surface. Roll the dough into a large rectangle (about 1/4-inch thick) sprinkle the filling evenly over the rolled out dough. Make sure that you leave a 1/2 inch border all the way around. 

5. Once you have finished sprinkling the filling on the dough roll it up and then cut with a sharp knife into 12-16 pieces. Place each roll in a muffin tin and bake for 20 minutes.
6. While the rolls are in the oven you can start on the frosting. In a medium bowl, mix together all the frosting ingredients with an electric hand mixer on low.
7. Remove rolls from oven and let cool for 10 minutes before removing from the muffin pan. To ice the buns you can either smear it on top with a spatula or you can put the icing in a plastic bag and cut a small hole at the bottom corner to use as a piping bag. 

Pavlova

This interesting dessert originated in Australia and was made to celebrate the visit from a Russian ballerina called Anna Pavlova. It is basically a twist on the classic meringue but instead of tiny bites sized meringues this is a giant meringue, topped with whipping cream and fresh fruit.


The first time I tried to make this recipe it was a total disaster. Mistake number one was that I tried to beat the egg whites with the paddle attachment instead of the whisk on my Kitchen Aid mixer. My next mistake was that I added the cornstarch before the eggs whites had been mixed well enough. Then it went from bad to worse. Discouraged that my recipe wasn't working, I decided to try and salvage my cornstarch and egg whites by getting creative. I tried to add flour and turn the batter into cookies. I used the wrong temperature clearly because after 10 minutes, the kitchen was filled with smoke and the fire alarm was ringing. What can I say? Sleep deprived teenagers and Mondays don't mix well!

When I tried this recipe again it turned out great and was easier then I had thought it would be. This really taught me that it is completely healthy to make mistakes and the results are often worth it. Like one of my favorite childhood television shows always says, "Take chances, make mistakes and get messy".


Yields: 1 cake
Prep time: 20 minutes
Total time: 1 hour

Ingredients
2 egg whites
1 teaspoon cornstarch
1 cup sugar
1 teaspoon fresh lemon juice
1 teaspoon vanilla extract
6 kiwis, sliced (or your choice of fresh fruit)
1 cup whipping cream (or Cool Whip, thawed)
Directions

1. Position a rack in the lower third of the oven. Preheat the oven to 300F. Line a baking sheet with parchment paper and draw a 9-inch circle with a pencil on the paper. This will act as your guide lines for the meringue.

2. In the bowl, use an electric hand mixer to beat egg whites until they are well mixed. Add in cornstarch and the mix until white and foamy. Gradually add the sugar and continue beating until stiff, shiny peaks start to form. Quickly add in lemon juice and vanilla. 

3. Spread the meringue inside the circle you have drawn and build up the edges of the pavlova to form a rim. Bake for 40 minutes or until crispy. Important - Turn off the oven and open he door, letting the pavlova completely cool before you take it out of the oven. This keeps the meringue from cracking from the change in temperature. When cooled remove from oven and top with the whipping cream that has been whipped with a whisk attachment until stiff peaks have formed. For some reason this would not work for me so in the end I used some thawed Cool Whip. 

4. Peel and slice the kiwis into thin slices and arrange in a pretty pattern on top of the cake. Let it sit for 10 minutes before you serve it to let the centre soften a bit. Keep in the refrigerator until ready to serve and keep cool.   

Adapted from William Sanoma The Best of Kitchen Library: Desserts