Showing posts with label teens bake. Show all posts

Thursday, 18 April 2013

White Chocolate Butterscotch Cookies

White Chocolate... Just saying it makes me want some of these cookies. The combination of score bits and white chocolate make for a killer cookie if you ask me.

I had gotten a big chunk of white chocolate for Easter a while ago an it has just been resting on my desk for the past week or two, so i decided to do something with it. It was probably a good idea because these cookies tasted pretty good and they didn't last very long. 

Yields: 5 dozen
Prep time: 10 minutes 
Bake time: 8 minutes

Ingredients 

    • ⅔ cup melted butter
    • 2 cups lightly packed brown sugar
    • 2 eggs
    • 2 tablespoons hot water
    • ½ teaspoon vanilla
    • 2⅓ cups all-purpose flour
    • 1 teaspoon baking powder
    • 1 teaspoon baking soda
    • ¼ teaspoon salt
    • White chocolate, chopped (about 80 grams)
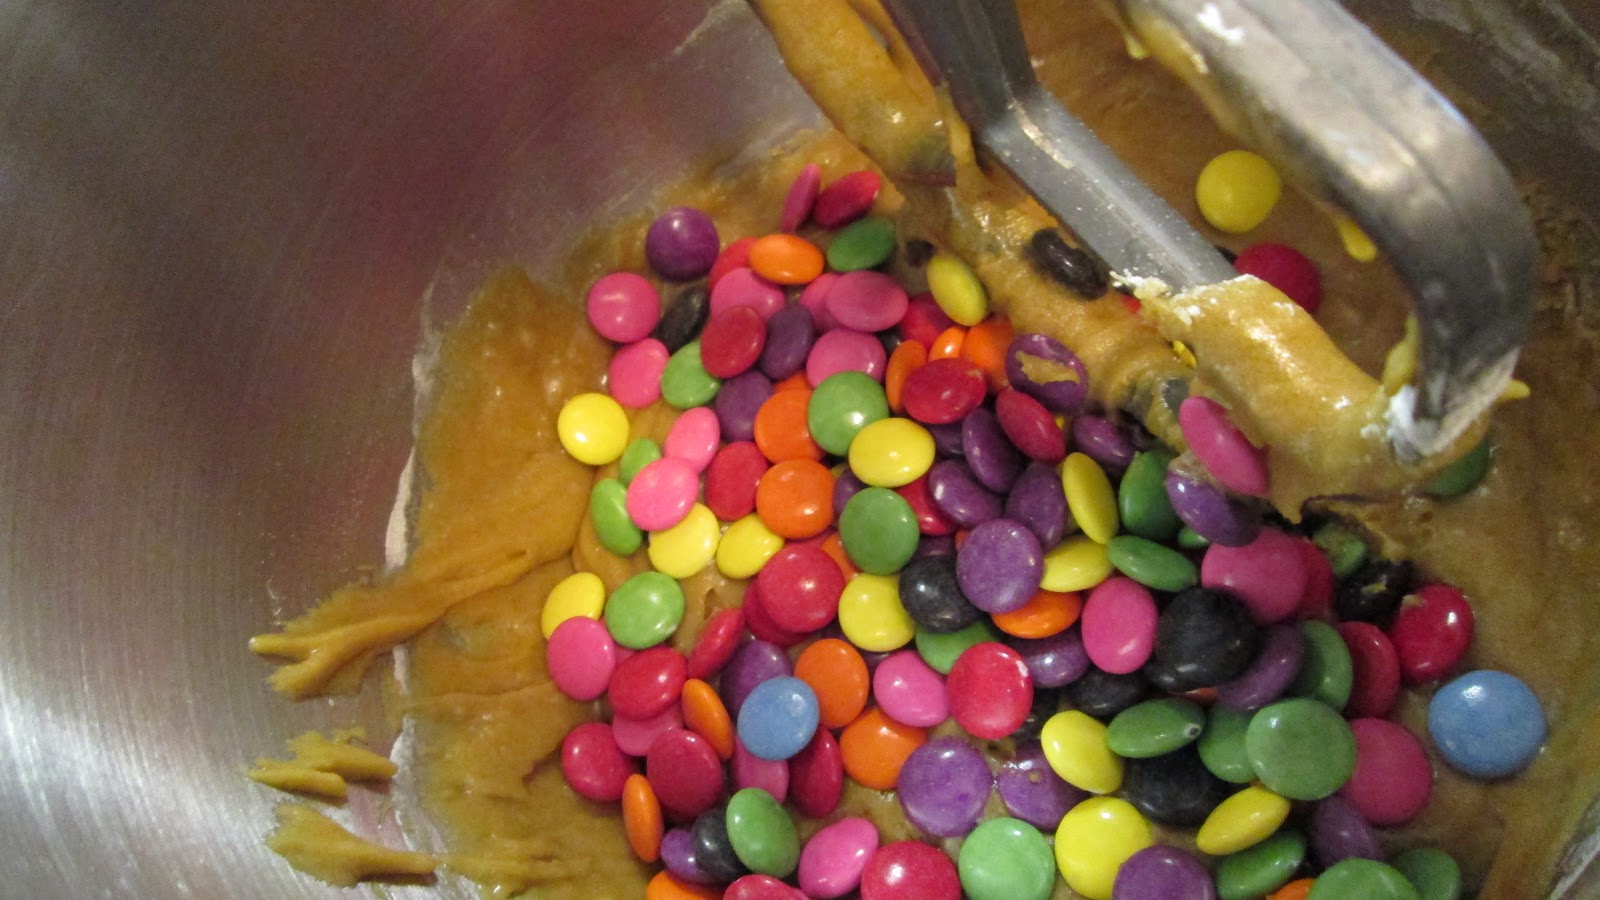
    • Score bits (about 80 grams)

Directions

1. Preheat oven to 375 F and line two sheets with parchment paper.

2. Beat melted butter, brown sugar, eggs, hot water and vanilla until very smooth (2-3 minutes).

3. In a medium bowl combine flour, baking powder, baking soda and salt. Add all the dry ingredients to the butter, sugar, eggs, water and vanilla. Mix well. Stir in the chocolate and score bits and roll 1 inch balls of dough with 12 cookies per sheet.

4. Bake for 8-9 minutes. 

Friday, 12 April 2013

Fancy Ice Cream Toppers

Whenever I would see these things on top of desserts I thought they were so elegant but somewhat intimidating. Well I recently attempted these fancy chocolate toppers and they were surprisingly easy. 


Oh boy! I haven't had ice cream in a while, I kind of forgot about it believe it or not. Since I have been making all of these desserts lately I haven't really been eating it that much. Tonight I enjoyed a scoop of mint chip (my favourite) while studying for exams (not my favourite.) I am actually pretty proud of how these came out. You can make just about anything, hearts, squiggles, zigzags or anything your heart desires.


Ingredients

  • 1/4 cup of semi-sweet chocolate chips
  • 1/2 tsp of canola or vegetable oil 
  • A scoop of your favourite ice cream

Directions

1. Combine the chocolate chips and oil in a microwave safe bowl
microwave for 3 sets of 20 second intervals. Stirring in between intervals.

3. Set up a sheet of wax paper on a plate and use a spoon or spatula to drizzle patterns on the paper. You may not get it at first but practice makes perfect.

4. Store in the fridge for at least 15 minutes before serving on top ice cream. When they are ready serve, scoop ice cream in a bowl and gently peel off the chocolate and place it on top the ice cream. Store in the fridge for up to 4 days.

Wednesday, 10 April 2013

Tapioca

This pudding is an old favourite of mine. I really love this dessert. Tapioca isn't everybody's cup of tea but I love it to bits. Every time I make some it disappears in 10 seconds flat. I sometimes add a raspberry reduction on top to even out the sweet flavour of tapioca with the tart taste of raspberries. If you are looking to get creative, serve them in martini glasses.


I'll give you all an update on the status of my cookbook that I have been working on. As many of you may know, this blog started out as a project for a tech glass. But I enjoyed it so much that I decided to continue the blog. I finished the cookbook and submitted it for marking last week. I hope I do well because I have really been working hard these past few months. 

Yields: 4 servings
Prep time: 5 minutes
Total time: 42 minutes

Ingrediens 
1/4 cup sugar
3 tbsp Minute Tapioca (I use Club House)
1/4 tsp salt
3 cups milk
1 egg
1 tsp vanilla extract

Directions
1. In a large saucepan whisk together the sugar, tapioca, salt milk and egg. Let stand for 5 minutes.

2. Bring to a boil on medium heat, whisk occasionally until it come to a full boil. This will take about 17 minutes.

3. Let cool for 20 minutes, whisk twice in that time. Pudding will thicken as it cools. Serve warm or chilled, store leftovers in the fridge.

Note: Looking to spice up this recipe? Try this Raspberry Reduction to top everything off.

Recipe adapted from Club House Minute Tapioca package

Monday, 8 April 2013

Smarties vs M&M's

Both of these candies are really delicious but when you make them with cookies is there one that is better to use? Well I was curious to which one works best when baking. 


At first I had made these Smartie cookies, and they were really good. But just recently I tried the same recipe but with M&M's. So here's the verdict... Don't get me wrong! I love M&M's, I personally think that they taste better and they also have better colours, but when they were baked they weren't as good as the smarties where. They tasted kind of funny, but the smarties tasted even better then they did on their own!  So next time you can't decide which one to use, now you know. 

Wednesday, 27 March 2013

Blondies

Blondies are an interesting treat, they are almost like brownies but blonde. You would think that at first the chocolate element is what makes these bars taste good, but when you try these it will change you opinion completly. Blondies are like very, very chewy cookies that are made into bars and cut into squares. They are probably just as good as any brownie recipe, if anything better. 


I have been making these for the longest time. I was first introduced to the idea of blondies from watching the Nancy Drew movie. This was one of my favourite movies growing up. In one part of the movie Nancy talked about lemon bars and blondies that her friend Hannah had made for her. (How cool that I share a name with this character!) I first experimented with blondies was when I was hanging out with my cousin Olivia. We always have so much fun together in the kitchen, and being a fellow fan of Nancy Drew we made blondies. From then on I love making blondies, as it always reminds me of one of my favourite movies.

Yields: 24 bars
Prep time: 10 minutes
Total time: 40 minutes 


Ingredients
1/2 cup butter
2 cups brown sugar
2 eggs
1 1/2 teaspoons vanilla 
2 cups all-purpose flour
1 1/2 teaspoon baking powder
1/2 teaspoon salt
1/4 cup semi-sweet mini chocolate chips

Directions 
1. Preheat oven to 300F and spray a 9 x 13-inch pan with cooking spray.

2. In bowl of electric stand mixer, combine butter, brown sugar, eggs and vanilla. Stir on medium for 1 minute. In a separate bowl combine all the dry ingredients. Add the dry ingredients to the wet ingredients and mix on low for 15 seconds. Add in chocolate chip and continue stirring until the ingredients are well combine.

3. Press dough into pan and bake for 20-25 minutes. Cool in pan before removing. Cut into 24 squares.

Adapted from KitchenAid Best-Loved Recipes by Lou Weber


Tuesday, 26 March 2013

Cinnamon Rolls

Oh...My... Goodness... Cinnamon buns are possibly one of the best treats EVER! I have never met someone who has ever turned down one of these. It is usually the deal breaker to anyone's new diet plans but let me tell you, this is so worth it! 
 I have serious problems when it comes to cinnamon buns. I think it has something to do with the fact that there is a Cinnabon store in the subway station that I have to walk by twice day. It is pure torture. Thinking about them just makes my mouth water. so I shall cut this post short or else I might find myself at Cinnabon instead of working on my endless piles of homework. This recipe allows you to create your own cinnabon store in the comfort of your home. They taste great (especially warm) and are so worth the time it takes to roll the dough and make them perfect.


Yields: 16 rolls 
Prep time: 30 minutes
Total time: 1 hour


Ingredients 

For the Filling:
4 tablespoons butter, at room temperature
1 cup brown sugar
3 teaspoons cinnamon
For the Dough:
2 cups all-purpose flour plus more for rolling
2 tablespoons white sugar
3 teaspoons baking powder
1 teaspoon salt 
3 tablespoons butter at room temperature
3/4 cup 2% milk 
1 large egg beaten
For the Frosting:
2 ounces cream cheese, at room temperature
2/3 cup confectioners sugar
3 tablespoons 2% milk
Directions
1. Preheat oven to 400F. Spray a muffin tin with non-stick spray.
2. In a small bowl, combine all the filling ingredients with a fork or your fingers until crumbly and well mixed. Set aside.
3. Prepare the dough. In a large bowl, whisk together flour, sugar, baking powder and salt. Transfer the dry ingredients into the bowl of electric stand mixer and using the pastry attachment, work the butter into the flour mixture. Add the milk and the eggs and then stir until combined.
4. Roll the dough out on a floured surface. Roll the dough into a large rectangle (about 1/4-inch thick) sprinkle the filling evenly over the rolled out dough. Make sure that you leave a 1/2 inch border all the way around. 

5. Once you have finished sprinkling the filling on the dough roll it up and then cut with a sharp knife into 12-16 pieces. Place each roll in a muffin tin and bake for 20 minutes.
6. While the rolls are in the oven you can start on the frosting. In a medium bowl, mix together all the frosting ingredients with an electric hand mixer on low.
7. Remove rolls from oven and let cool for 10 minutes before removing from the muffin pan. To ice the buns you can either smear it on top with a spatula or you can put the icing in a plastic bag and cut a small hole at the bottom corner to use as a piping bag. 

Wednesday, 13 March 2013

Study Time Smartie Cookies

These will bring out the smarty pants in you! Chewy cookies really hit the spot when you are studying. As a student myself, I would like to dedicate this recipe to all the students who stay up late studying. These cookies might as well be called energy bars cause they definitely have the power to get you through those draining study sessions.   
   

This recipe made about five dozen cookies and to be honest... between me and my mom, they were finished in about one and a half days. That is just how good they were. These are the cookies that one dreams about floating alongside sugar plums on Christmas Eve! So congratulations on finding this recipe, I will warn you though... they won't last long!

Yields: 5 dozen
Prep time: 10 minutes 
Bake time: 8 minutes

Ingredients 
          • ⅔ cup melted butter
          • 2 cups lightly packed brown sugar
          • 2 eggs
          • 2 tablespoons hot water
          • ½ teaspoon vanilla
          • 2⅓ cups all-purpose flour
          • 1 teaspoon baking powder
          • 1 teaspoon baking soda
          • ¼ teaspoon salt
          • 1 package of smarties (about 200 grams)

Directions

1. Preheat oven to 375 F and line two sheets with parchment paper.

2. Beat melted butter, brown sugar, eggs, hot water and vanilla until very smooth (2-3 minutes).

3. In a medium bowl combine flour, baking powder, baking soda and salt. Add all the dry ingredients to the butter, sugar, eggs, water and vanilla. Mix well. Stir in the smarties and roll 1 inch balls of dough with 12 cookies per sheet.

4. Bake for 8-9 minutes. Happy studying! 


Inspired by: http://hiddenponies.com/2011/02/cookie-monsters/


Sunday, 10 March 2013

Banana Peanut Butter Smoothie


Smoothies are so yummy and this will definitely hit the spot when you are hungry after a long day or when you have finished a workout. It is my go to snack between meals or on a hot summer day.


I have been making these smoothies for ever, when ever I go out for a run I always whip up one of these when I come back. They make you feel like you just have eaten a big slice of banana bread. And not only is this a heathy treat, but it is super simple as well!

Yields: 2 servings
Prep time: 1 minute
Total time: 2 minutes

Ingredients
  • 1 banana
  • 1  cup milk
  • 6 ice cubes
  • 2 tablespoons peanut butter
Directions

1. Put all of the ingredients in the blender.

2. Shut the lid on top and blend for 1 minute. 

3. Serve into 2 glasses and enjoy!

Monday, 4 March 2013

Simply Chocolate Cake


Chocolate cake is just one of those things that every dessert expert need to know inside and out! This is a fool proof recipe. Chocolate was first introduced into the world of food in 1500 BC  and ever since then it as been a major dessert staple across the world.


 My mother has been making this cake for as long as I can remember. I asked her why this is her favourite chocolate cake recipe and she told me it was because it's the easiest thing, she likes it because she never has to worry about melting the chocolate as it uses cocoa powder. It use oil instead of stressing about melting the butter right. I thought I would share this with you because it not only is one of the easiest cakes but one of the tastiest ones as well.

Serves: 12
prep time: 10 minutes
Total time: 1 hour

Ingredients 

  • 2 cups sugar
  • 1-3/4 cups all-purpose flour
  • 3/4 cup cocoa
  • 1-1/2 teaspoon baking powder
  • 1-1/2 teaspoon baking soda
  • 1 tsp salt
  • 2 eggs
  • 1 cup milk
  • 1/2 cup vegetable oil
  • 2 teaspoon vanilla extract
  • 1 cup boiling water
Directions

1. Preheat oven to 350F. Spray 12-cup Bundt pan with non-stick spray.

2. With the flat paddle attachment, stir together sugar, flour, cocoa, baking powder, baking soda and salt in the bowl of your electric mixer. Add the eggs, milk, oil and vanilla, beat on medium speed for 2 minutes. On the stir speed add the boiling water. This will make the batter very thin and runny. 

3. Pour batter into pan. Bake for 50 to 55 minutes. Let cool for 10 minutes before removing from pan. Let cool completely. Once the cake has cooled, top with icing sugar (optional).