Showing posts with label cookbook for teens. Show all posts

Friday, 12 April 2013

Fancy Ice Cream Toppers

Whenever I would see these things on top of desserts I thought they were so elegant but somewhat intimidating. Well I recently attempted these fancy chocolate toppers and they were surprisingly easy. 


Oh boy! I haven't had ice cream in a while, I kind of forgot about it believe it or not. Since I have been making all of these desserts lately I haven't really been eating it that much. Tonight I enjoyed a scoop of mint chip (my favourite) while studying for exams (not my favourite.) I am actually pretty proud of how these came out. You can make just about anything, hearts, squiggles, zigzags or anything your heart desires.


Ingredients

  • 1/4 cup of semi-sweet chocolate chips
  • 1/2 tsp of canola or vegetable oil 
  • A scoop of your favourite ice cream

Directions

1. Combine the chocolate chips and oil in a microwave safe bowl
microwave for 3 sets of 20 second intervals. Stirring in between intervals.

3. Set up a sheet of wax paper on a plate and use a spoon or spatula to drizzle patterns on the paper. You may not get it at first but practice makes perfect.

4. Store in the fridge for at least 15 minutes before serving on top ice cream. When they are ready serve, scoop ice cream in a bowl and gently peel off the chocolate and place it on top the ice cream. Store in the fridge for up to 4 days.

Sunday, 31 March 2013

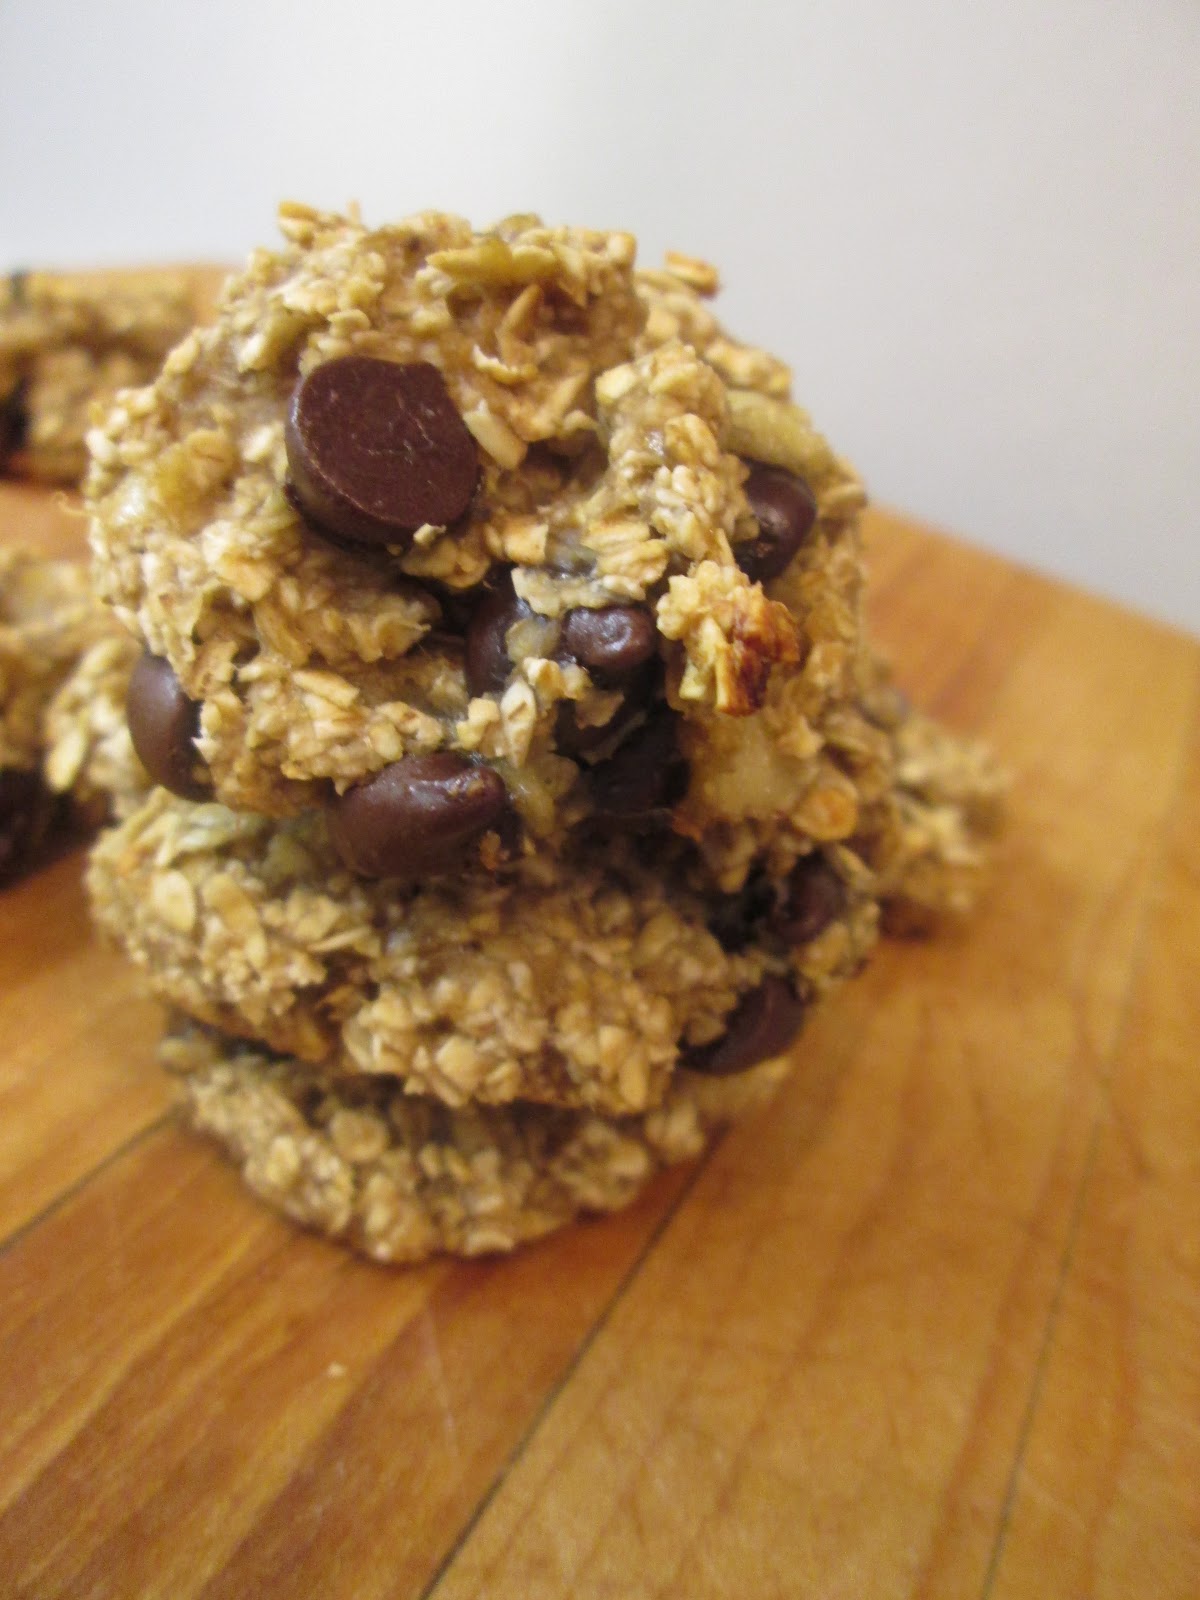
35 Calorie Banana Oat Cookies

WOW! These cookies took no-time at all, it only takes two ingredients and they are healthy. One cookies is only 35 calories (without chocolate chips)or 60 calories (with chocolate chips.) I was pleasantly suprised when I took a bite of these, they actually tasted pretty good. 


I was on pinterest one night and I saw these cookies, they popped out to me, I thought "healthy cookies? there's no such thing!" but when you do the math these are like the equivalent of about 2 saltine cracker. Pretty helpful when you are trying to cut back on sweets. Since I started this blog I have been making a lot of desserts and even hough I work-out a couple times a week, I still find it hard sometimes to stay fit. This recipe was a gift sent from the food gods and when ever I get those pesky cookie craving I will make these instead. 

Yields: 12 cookies
Prep time: 5 minutes
total time: 20 minutes


Ingredients
2 ripe bananas
1 cup oats
1/4 cup chocolate chips (optional) 

Directions
1. preheat oven to 350F and line 1 cookies sheet with parchment paper.

2. In a medium bowl mash together all of the ingredients with a fork.

3. Roll into 12 medium sized cookies and bake for 15 minutes. Cool and enjoy.

NOTE: These are good cookies to freeze and grab 2 when your in a hurry.  

Adapted from http://pinterest.com/pin/30399366207289117/

Wednesday, 27 March 2013

Blondies

Blondies are an interesting treat, they are almost like brownies but blonde. You would think that at first the chocolate element is what makes these bars taste good, but when you try these it will change you opinion completly. Blondies are like very, very chewy cookies that are made into bars and cut into squares. They are probably just as good as any brownie recipe, if anything better. 


I have been making these for the longest time. I was first introduced to the idea of blondies from watching the Nancy Drew movie. This was one of my favourite movies growing up. In one part of the movie Nancy talked about lemon bars and blondies that her friend Hannah had made for her. (How cool that I share a name with this character!) I first experimented with blondies was when I was hanging out with my cousin Olivia. We always have so much fun together in the kitchen, and being a fellow fan of Nancy Drew we made blondies. From then on I love making blondies, as it always reminds me of one of my favourite movies.

Yields: 24 bars
Prep time: 10 minutes
Total time: 40 minutes 


Ingredients
1/2 cup butter
2 cups brown sugar
2 eggs
1 1/2 teaspoons vanilla 
2 cups all-purpose flour
1 1/2 teaspoon baking powder
1/2 teaspoon salt
1/4 cup semi-sweet mini chocolate chips

Directions 
1. Preheat oven to 300F and spray a 9 x 13-inch pan with cooking spray.

2. In bowl of electric stand mixer, combine butter, brown sugar, eggs and vanilla. Stir on medium for 1 minute. In a separate bowl combine all the dry ingredients. Add the dry ingredients to the wet ingredients and mix on low for 15 seconds. Add in chocolate chip and continue stirring until the ingredients are well combine.

3. Press dough into pan and bake for 20-25 minutes. Cool in pan before removing. Cut into 24 squares.

Adapted from KitchenAid Best-Loved Recipes by Lou Weber


Tuesday, 26 March 2013

Pavlova

This interesting dessert originated in Australia and was made to celebrate the visit from a Russian ballerina called Anna Pavlova. It is basically a twist on the classic meringue but instead of tiny bites sized meringues this is a giant meringue, topped with whipping cream and fresh fruit.


The first time I tried to make this recipe it was a total disaster. Mistake number one was that I tried to beat the egg whites with the paddle attachment instead of the whisk on my Kitchen Aid mixer. My next mistake was that I added the cornstarch before the eggs whites had been mixed well enough. Then it went from bad to worse. Discouraged that my recipe wasn't working, I decided to try and salvage my cornstarch and egg whites by getting creative. I tried to add flour and turn the batter into cookies. I used the wrong temperature clearly because after 10 minutes, the kitchen was filled with smoke and the fire alarm was ringing. What can I say? Sleep deprived teenagers and Mondays don't mix well!

When I tried this recipe again it turned out great and was easier then I had thought it would be. This really taught me that it is completely healthy to make mistakes and the results are often worth it. Like one of my favorite childhood television shows always says, "Take chances, make mistakes and get messy".


Yields: 1 cake
Prep time: 20 minutes
Total time: 1 hour

Ingredients
2 egg whites
1 teaspoon cornstarch
1 cup sugar
1 teaspoon fresh lemon juice
1 teaspoon vanilla extract
6 kiwis, sliced (or your choice of fresh fruit)
1 cup whipping cream (or Cool Whip, thawed)
Directions

1. Position a rack in the lower third of the oven. Preheat the oven to 300F. Line a baking sheet with parchment paper and draw a 9-inch circle with a pencil on the paper. This will act as your guide lines for the meringue.

2. In the bowl, use an electric hand mixer to beat egg whites until they are well mixed. Add in cornstarch and the mix until white and foamy. Gradually add the sugar and continue beating until stiff, shiny peaks start to form. Quickly add in lemon juice and vanilla. 

3. Spread the meringue inside the circle you have drawn and build up the edges of the pavlova to form a rim. Bake for 40 minutes or until crispy. Important - Turn off the oven and open he door, letting the pavlova completely cool before you take it out of the oven. This keeps the meringue from cracking from the change in temperature. When cooled remove from oven and top with the whipping cream that has been whipped with a whisk attachment until stiff peaks have formed. For some reason this would not work for me so in the end I used some thawed Cool Whip. 

4. Peel and slice the kiwis into thin slices and arrange in a pretty pattern on top of the cake. Let it sit for 10 minutes before you serve it to let the centre soften a bit. Keep in the refrigerator until ready to serve and keep cool.   

Adapted from William Sanoma The Best of Kitchen Library: Desserts


Apple Crumble

Apple crumble is a dish usually served in the fall to celebrate the harvest. Every great dessert expert needs a good apple crumble recipe. Apple crumble is also sometimes known as apple crisp. It can be eaten year round, for breakfast, lunch or dinner. It's hard to turn down a warm piece of apple crumble topped with your favorite vanilla ice cream. This one happens to be simply delicious!


I have taken a break from blogging for the past week, I have been so busy working on my cookbook, and other homework that I haven't been able to blog about all the lovely things I have made! So what a great way to get back into the groove of things by sharing with you this lovely apple crumble recipe. This is the first  time I have made this one but I honestly couldn't get enough of it!

Yields: 1 dish (serves about 6)
Prep time: 20 minutes
Total time: 55 minutes

Ingredients

For the Crumble:
1 1/3 cups all-purpose flour
1/4 teaspoon of cinnamon
1/2 cup butter
1/4 cup brown sugar

For the Filling:
1 1/2 pounds (about 6) macintosh apples, peeled, cored and sliced thinly
1/8 cup sugar
1/4 cup apple or orange juice 

Directions

1. Preheat oven to 350F. Butter an oven safe casserole dish. It should be about 8 x 11 inches and at least 3 inches deep. The size is not that important as you can make an extra dish with any left over filling and crumble. 

2.  Sift flour and cinnamon in a large bowl. Add the softened butter into the flour and cinnamon mixture, and stir well. Rub the butter into the flour with your fingers until the flour has completely absorbed the butter and I looks like bread crumbs. Then stir in brown sugar.

3. Wash and peel your apples using a potato peeler. Slice the apples into small wedges, or cube them up. Either way is fine. Put the chopped apples in a separate bowl and sprinkle sugar over them, mix well. Spoon the apples into your dish and pour the juice over them. Cover with crumble and bake for 35-40 minutes or until the top is golden brown. 

4. Let cool for 10 minutes and them serve with ice cream or on its own. Enjoy!

Wednesday, 13 March 2013

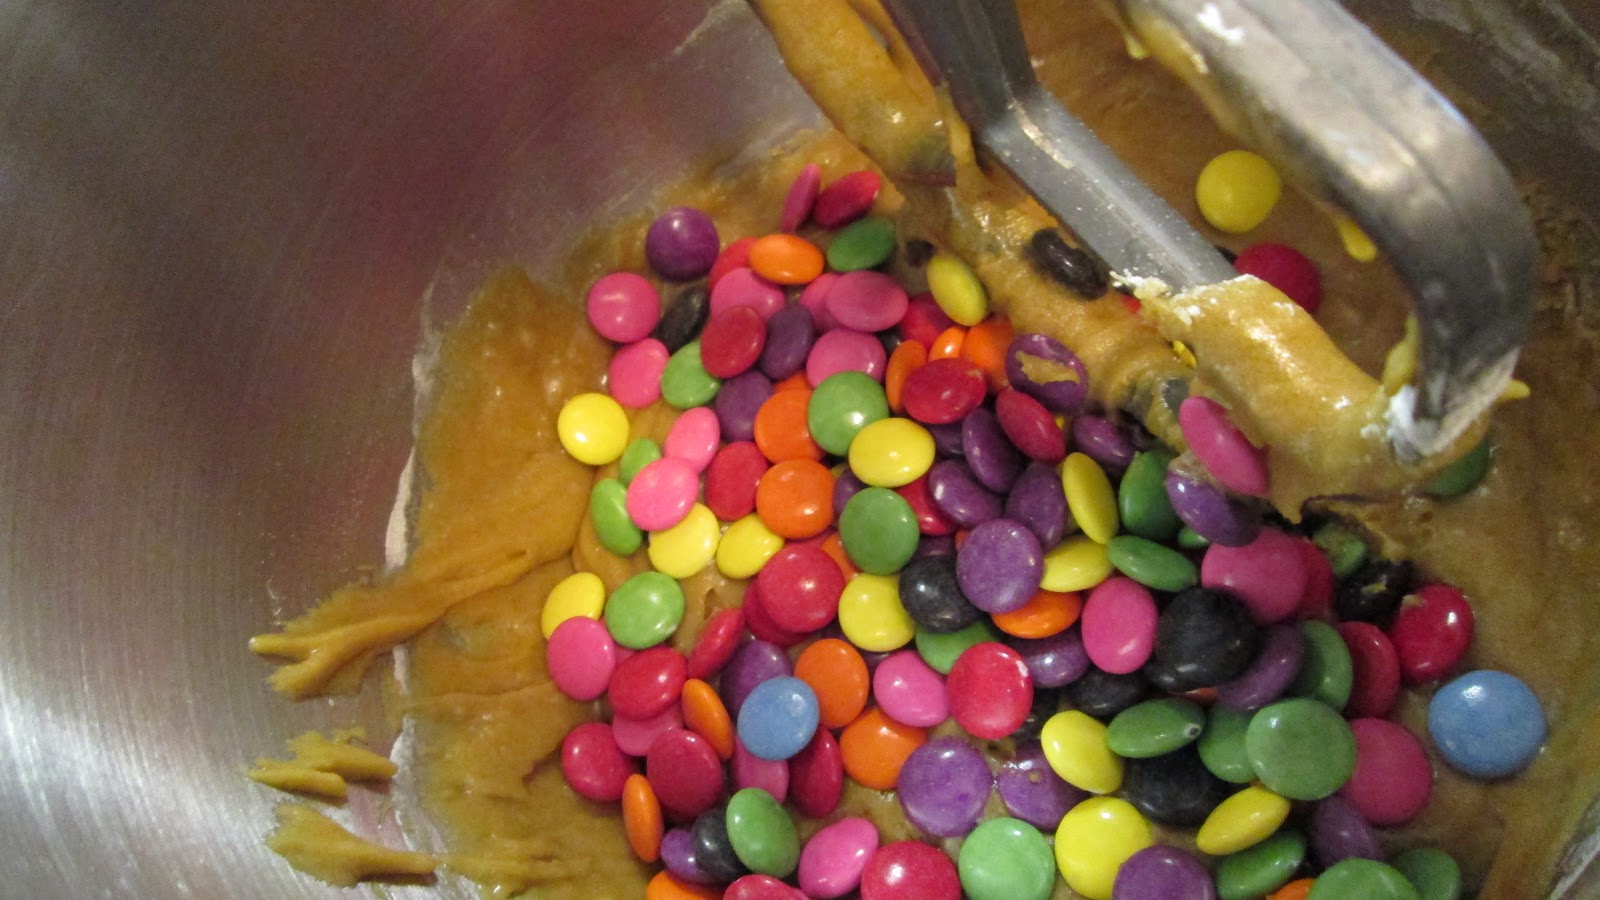
Study Time Smartie Cookies

These will bring out the smarty pants in you! Chewy cookies really hit the spot when you are studying. As a student myself, I would like to dedicate this recipe to all the students who stay up late studying. These cookies might as well be called energy bars cause they definitely have the power to get you through those draining study sessions.   
   

This recipe made about five dozen cookies and to be honest... between me and my mom, they were finished in about one and a half days. That is just how good they were. These are the cookies that one dreams about floating alongside sugar plums on Christmas Eve! So congratulations on finding this recipe, I will warn you though... they won't last long!

Yields: 5 dozen
Prep time: 10 minutes 
Bake time: 8 minutes

Ingredients 
          • ⅔ cup melted butter
          • 2 cups lightly packed brown sugar
          • 2 eggs
          • 2 tablespoons hot water
          • ½ teaspoon vanilla
          • 2⅓ cups all-purpose flour
          • 1 teaspoon baking powder
          • 1 teaspoon baking soda
          • ¼ teaspoon salt
          • 1 package of smarties (about 200 grams)

Directions

1. Preheat oven to 375 F and line two sheets with parchment paper.

2. Beat melted butter, brown sugar, eggs, hot water and vanilla until very smooth (2-3 minutes).

3. In a medium bowl combine flour, baking powder, baking soda and salt. Add all the dry ingredients to the butter, sugar, eggs, water and vanilla. Mix well. Stir in the smarties and roll 1 inch balls of dough with 12 cookies per sheet.

4. Bake for 8-9 minutes. Happy studying! 


Inspired by: http://hiddenponies.com/2011/02/cookie-monsters/


Monday, 11 March 2013

Homemade Peanut Butter Bites

These little peanut butter bites are super easy and they taste just like the Reese's Peanut Butter Cups. These little guys are a no-brainer!


 I made these one day while I had a cheesecake was in the oven. They were pure experimentation but they turned out pretty awesome. You might recognize the melted chocolate recipe from an earlier post on chocolate covered almonds.


Yields: 12 small bites 
Prep time: 5 minutes
Total time: 20 minutes

Ingredients
  • 1/3 cup natural peanut butter (no additives)
  • 1/3 cup confectioners sugar
  • 1/3 cup all-purpose flour
  • 1/2 cup semi-sweet chocolate chips
  • 1/2 tablespoon canola oil
Directions

1. Prepare a plate with a sheet of wax paper on top for the peanut butter bites to be rested on.

2. In a small bowl mix together peanut butter, confectioners sugar and flour. Mix until combined and set aside.

3. In a microwave safe bowl, put the chocolate chips and canola oil in the microwave and heat for 20 seconds. Stir and heat for another 20 seconds. Stir again and then give it another 20 seconds if needed.

4. Roll the peanut butter mixture into small 3/4 inch balls and dip in chocolate using a spatula or spoon. Rest each one on the wax paper.

5. Refrigerate for 15 minutes. Store in the refrigerator for up to 5 days.


Monday, 4 March 2013

Simply Chocolate Cake


Chocolate cake is just one of those things that every dessert expert need to know inside and out! This is a fool proof recipe. Chocolate was first introduced into the world of food in 1500 BC  and ever since then it as been a major dessert staple across the world.


 My mother has been making this cake for as long as I can remember. I asked her why this is her favourite chocolate cake recipe and she told me it was because it's the easiest thing, she likes it because she never has to worry about melting the chocolate as it uses cocoa powder. It use oil instead of stressing about melting the butter right. I thought I would share this with you because it not only is one of the easiest cakes but one of the tastiest ones as well.

Serves: 12
prep time: 10 minutes
Total time: 1 hour

Ingredients 

  • 2 cups sugar
  • 1-3/4 cups all-purpose flour
  • 3/4 cup cocoa
  • 1-1/2 teaspoon baking powder
  • 1-1/2 teaspoon baking soda
  • 1 tsp salt
  • 2 eggs
  • 1 cup milk
  • 1/2 cup vegetable oil
  • 2 teaspoon vanilla extract
  • 1 cup boiling water
Directions

1. Preheat oven to 350F. Spray 12-cup Bundt pan with non-stick spray.

2. With the flat paddle attachment, stir together sugar, flour, cocoa, baking powder, baking soda and salt in the bowl of your electric mixer. Add the eggs, milk, oil and vanilla, beat on medium speed for 2 minutes. On the stir speed add the boiling water. This will make the batter very thin and runny. 

3. Pour batter into pan. Bake for 50 to 55 minutes. Let cool for 10 minutes before removing from pan. Let cool completely. Once the cake has cooled, top with icing sugar (optional). 


Monday, 18 February 2013

Welcome to the kiss cookbook blog

some of my favourite cookbooks.


Some people like to eat dessert, some people like to make desserts, some people like to make and eat their desserts. I happen to fall under the last category and if you’re like me then you will love this cookbook blog. I’m not embarrassed to consider myself a beginner when it comes to baking. Now that I have reached an age where I can be more independent in the kitchen, I have developed a sweet tooth and a love for baking.

As I have learned, when you can find a recipe that tastes great and happens to be simple too, you have found the perfect recipe. This blog is all about the marriage of simple recipes and that have a great taste. That's right. Welcome to desserts central.

 There is a natural attraction to doing things that are simple. Simplicity is easier when you are a beginner and for desserts, if it tastes good and it's simple then you have a winner. This cookbook blog is made for people who love to bake but don’t necessarily have the time to go crazy, or to go shopping for unusual ingredients. If there is one thing I have learned when it comes to making desserts, it is this: the simpler the better.

The reason for my title "kiss" is because of the well-known acronym; Keep It Simple Stupid. However, in my case, I like to see it as "keeping it super simple". I have always admired this acronym and while I was coming up with a name I realized that KISS applies to baking almost as much as it applies to life itself. Over my past years of experience with baking, this is one of the most important lessons I have learned. When you try to get all fancy and ambitious with recipes, things can get messy. So I thought it would be fantastic if I could make a cookbook with recipes that are easy, and taste good too!


A painting I did a while ago.